Rooms
Usage
This screen enables you to create new rooms specifying days the room is available as well as opening hours. You can also list reasons whereby the room
may need to be closed, who has access to the room and the maximum
number of staff members permitted in each room.
Setup
The 4 tabs to select when creating a room are:

Rooms tab
Here you can select which days the room is open and for how long, you must select at least one unit from where the staff members
will be allocated:.
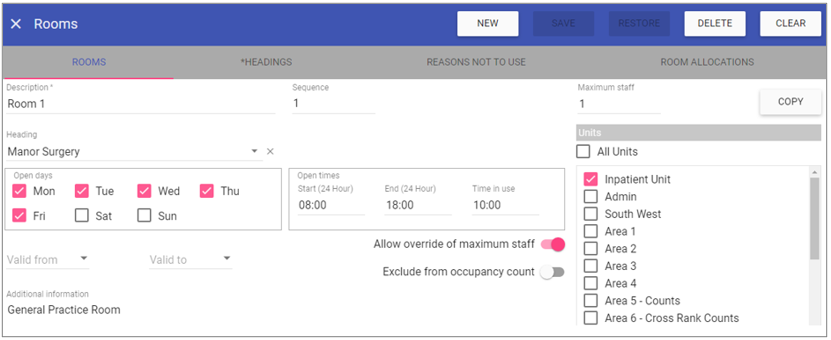 Description: Type in the Room name, this is a Mandatory field of 20 Characters max.
Sequence: Designates the order in which the rooms appear.
Heading: Allows you to organise rooms into sub-headings such as locations/buildings.
Open days: Select which days when the room is available to be booked.
Open times: Allows you to choose the start and end times the room is open.
Valid from and to: This allows you to create rooms for a set timeframe and remove them after a date when they are no longer in use.
Allow override of maximum staff: If selected this will allow the overriding of the maximum occupancy for the room via the Room Bookings screen but with a
warning and upon overriding there will be an over-occupied flag against that booking.
Exclude from occupancy count: If selected, this room will not show in the Room Occupancy Report.
Additional information: This can include any equipment/uses that a room has. This is a free text field which will display on hover over.
Maximum Staff: Allows you to assign the maximum allowance of staff for the room.
COPY: Allows you to copy the room set up, change the name and make minor changes.
Units: Staff members can be assigned to rooms from the units selected.
Headings tab
This allows you to create headings under which rooms will be ordered on the Room Bookings screen and also in any lists systemwide. Headings can be used for locations,
or any other information by which you wish to sub divide rooms. Any rooms not assigned to a heading will default to the UNALLOCATED headings.
By clicking on a pre-existing heading or clicking NEW you will be presented with the following options:
 Name: Up to 40 Characters for the Heading is allowed and must be unique.
Sequence: 1–99998 allowed for entry in this field and will order lowest to highest systemwide.
Reasons Not to Use tab
A list of all the reasons that a room can be closed for is displayed on entry in to this tab: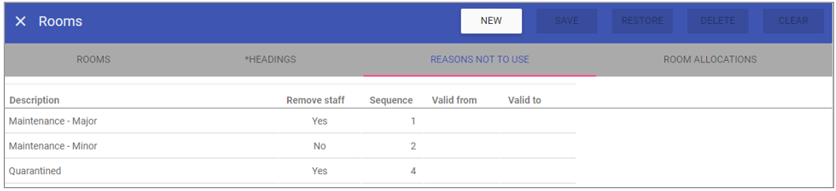 Clicking NEW will open the controls for setting up a reason, or clicking on a pre-existing reason in the list will allow you to edit it:
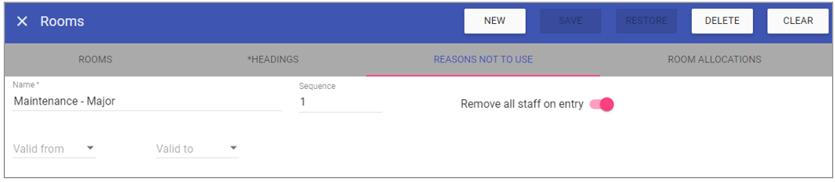 Name: Mandatory, allows you to enter up to 40 Characters as to why a room is closed, must be unique.
Sequence: Orders each reason in this screen and in lists systemwide, lowest to highest.
Valid from and to dates: Allows you to add new reasons for selection from a certain date and allows you to archive reasons no longer required.
Remove all staff on entry: This will remove a staff member allocated to a room which is then closed.
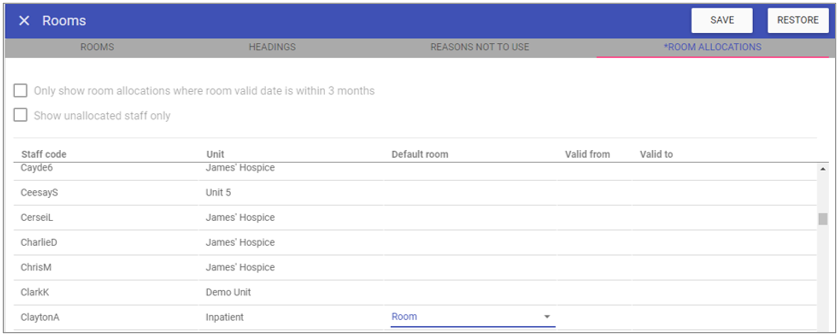
Room Allocations tab
This lists the units and staff who could be allocated, and filters can be applied to certain units:
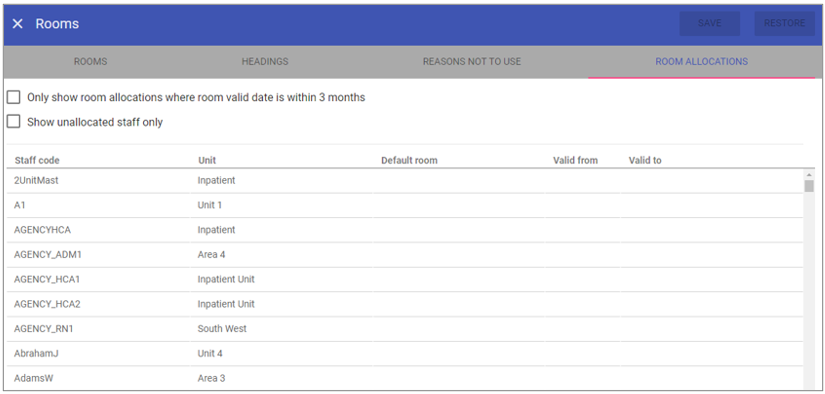 Only show room allocations where room valid date is within 3 months: This will apply if Valid From and To dates have been added in Admin > Rooms.
Show unallocated staff only: This will only show staff who have no default room selected.
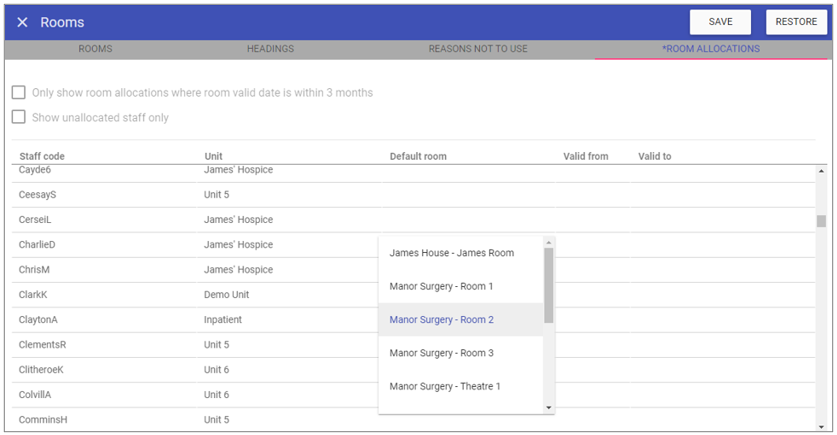
Under the Room Allocations tab, you can add a default room to a staff member, click alongside the staff member’s name under Default room:
 The list of rooms is displayed, so select which room the staff member will default to:
 Once selected, the room now displays under the Default room heading:
 Each of the headings can be sorted in ascending/descending order by clicking on the heading where the arrow will appear:
 NOTE: If you default a room to a staff member through Admin > Rooms > Room Allocations, this will also update the work pattern and the staff member’s record in Staff Maintenance.
Deleting a Room
1. Select room from the list to be deleted.2. The room will open to show details of the selected room.
3. Click DELETE at the top of the page.
4. Click DELETE in the message to confirm the deletion.