Events
Usage
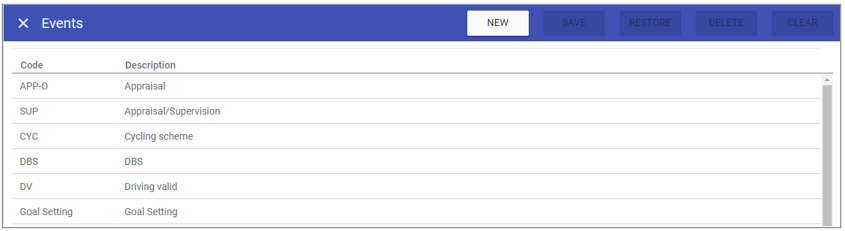
This screen allows you to create new events, as well as maintaining existing events that are stored on the system (an example of an event could be a disciplinary meeting).
Event Maintenance
1. To add or edit details of an
event that has already been created, select
it by double clicking on the required
event.
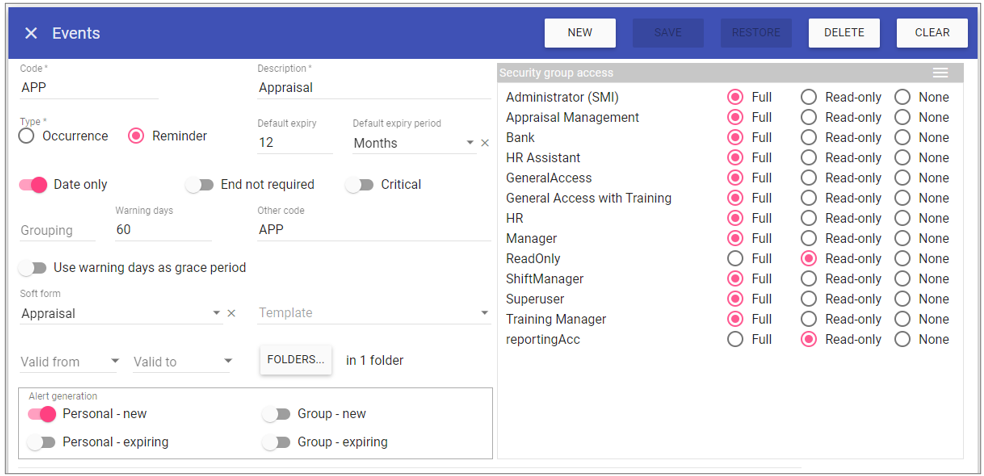
2. The fields that are available for editing are displayed.
 3. Add or edit the required details in the visible fields for the specific
event.
3. Add or edit the required details in the visible fields for the specific
event.
Code: Is the unique identifier for the
event set by the user.
Description: The name of the event.
Type - Occurrence: Use when the event is to designate when something is completed and defaults the acknowledged checkbox to true.
Type - Reminder: Use when the event denotes something that is upcoming/needs renewing. This will show in the event viewer upon log in,
the number of warning days before the end date of the event and the acknowledged checkbox will default to false.
Default expiry and expiry period: This will automatically generate an end date when the item is added to a staff record, useful for items
that need renewing over specific periods.
Date only: Requires only date entry in Staff Maintenance, meaning times are no longer added.
End not required: Primarily for qualifications that once achieved do not expire, meaning they have no end date.
Critical: Allows you to set the item to flag the staff member on the rota when it expires and thereafter.
REMEMBER: Only to be used for an item whereby if they expire the staff member CANNOT be rostered!
Warning Days: The number of days before the end date that this will display as expiring in the dashboard.
NOTE: This means when adding a new staff member who requires a DBS, the end date will be 89 days after the contract start date.
Use warning days as grace period: Using the number of warning days to set the end date of the item when added via the new Items Matrix workflow step in Staff Maintenance.
Soft form: Allows you to attach a previously created soft form to the event - created in Admin > Soft Forms.
Template: Used to attach a document template if required for mail merge -
created in Admin > Templates.
Valid From: The date the event is available for use.
Valid To: The date the event expires and is no longer available for use.
Folders: Allows you to see/set which folder(s) the item is associated to.
Alert generation:
NOTE: The users Security Group must have read-only or above access to the item to receive the following alerts:
Personal – new: Sends an alert to the staff member when added to their record in Staff Maintenance as long as their security group has read-only or above access.
Personal – expiring: The user will receive an alert for reminder items when the warning days period before the end date is reached.
Group – new: Allows managers to receive alerts for their staff when a new item has been added to a staff member whom they manage.
Group – expiring: Allows managers to receive alerts for their staff when the warning days period before the end date of the item is reached for a staff member whom they manage.
NOTE: The Group Alerts must be setup (in Admin > Alert Groups) and managers must have the alert group selected in Staff Maintenance, in order to receive the new item alerts.
Staff must have the new expiring alert selected in their Staff Maintenance record to receive Personal - expiring item alerts.
Security group access: Choose which security groups have access to the particular
Event.
4. Click on the SAVE button at the top of the screen.
Creating a New Event
1. Click on NEW at the top right of the screen.
2. Fill in the details for the event and specify which Security Groups have access to it.
3. Click SAVE.
The event should now appear in the list of events when accessing this screen.
Deleting an Event
1. Select the required event.2. The screen will change to show the details of the selected event.
3. Click DELETE at the top of the page.
4. Click DELETE to the delete message.
Items Management Dashboard - Event
All Events have the ability to be flagged as expiring/expired via the Items Management dashboard. They all have a number of warning days and staff will be alerted when new items are added to their record. There is also the ability to mark items so expiry is ignored (if a job role changes for which that specific item is no longer required). By selecting this option, the item will not flag for that staff member in the dashboard.Go to Dashboards to select Options within the Items Management dashboard, and view.