Save Levels
Usage
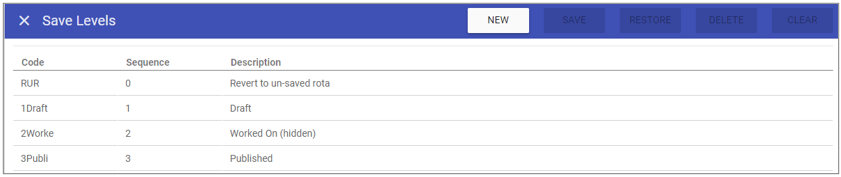
This screen allows you to create new save levels, as well as maintaining existing save levels that are stored on the system.
Save Level Maintenance
1. To add or edit details of a
save level that has already been created,
select the save level by double clicking on the required
save level.
2. The selected save level is highlighted in
grey and the fields that are available for editing are displayed.
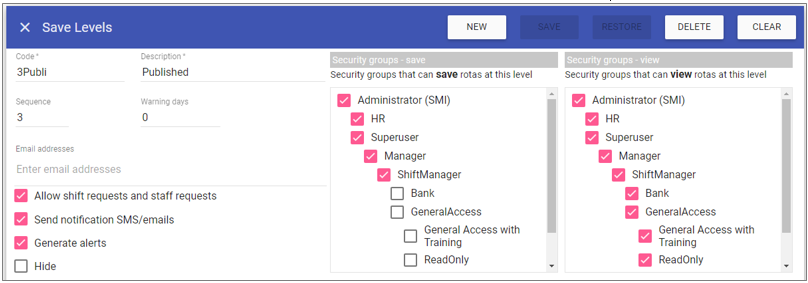 3. Add or edit the required details in the visible fields for the specific ../images/admin/save-levels/save-levels.png.
Code: Is the unique identifier for the
save level set by the user.
Description: The name of the
save level.
Sequence: This determines where in the drop down list the item will appear. (E.g. 1 = the Top item / 4 = Fourth item down).
Warning Days: Choose a colour for the priority as a visual representation.
Email addresses: Choose a colour for the priority as a visual representation.
Allow shift requests and staff requests: Choose a colour for the priority as a visual representation.
Warning Days: Choose a colour for the priority as a visual representation.
Send notification SMS/emails: Choose a colour for the priority as a visual representation.
Generate Alerts: When selected, any changes made to rotas
or room bookings saved at this level, will send an alert to the affected staff on Save.
Hide: Choose a colour for the priority as a visual representation.
Security group - save: Choose a colour for the priority as a visual representation.
Security group - view: Choose a colour for the priority as a visual representation.
4. Click on the Save button at the top of the screen.
Creating a New Save Level
1. Click on New at the top right of the screen.
2. Fill in the details for the save level.
3. Click Save
Note: The save level should now appear in the list of
save levels when accessing this screen.
Deleting a Save Level
1. Select the save level by double clicking on the required save level.2. The screen will change to show the details of the selected save level.
3. Click delete at the top of the page .
4. Click DELETE to the delete message.