Soft Forms
Usage
This screen allows you to create new soft forms, as well as maintaining existing soft forms that are stored on the system.
Soft Form Maintenance
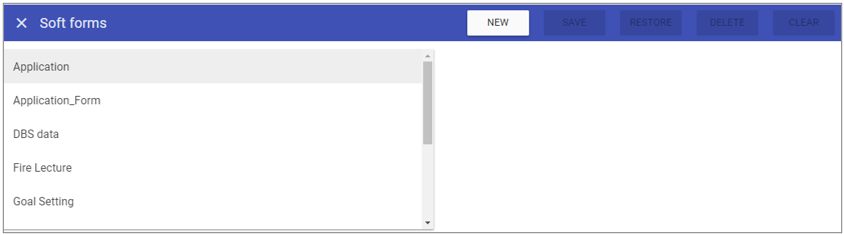
1. To add or edit details of a soft form that has already been created, select the soft form by choosing it from the drop down menu.
2. The selected soft form is highlighted in grey and the fields that are available for editing are displayed.
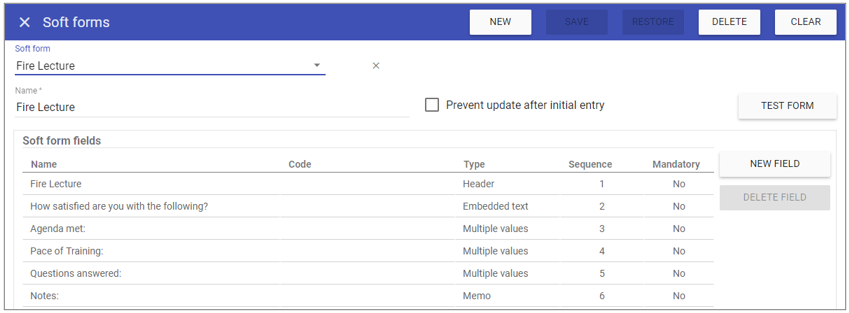 3. Add or edit the required details in the visible fields for the specific soft form.
Soft form: A previously built form that is selectable.
Name: The name of the soft form.
Prevent update after initial entry: Once a soft form has been filled out against a staff record it can not be edited. A new one will need to be added to show additional information.
Test Form: Displays a visual representation of the soft form build.
Delete Field: Allows for previously created saved fields to be removed.
New Field: Displays a list of the available fields to add to the soft form. The following screenshot shows the screen change and
available fields upon creating new fields.
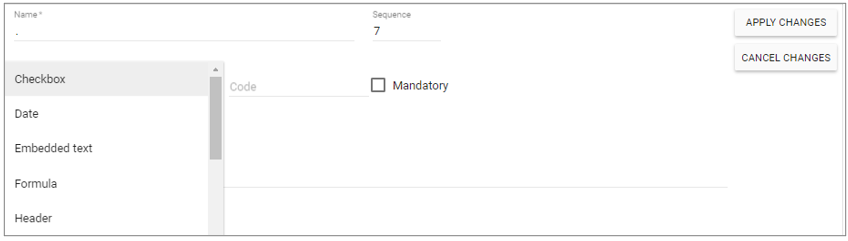 Name: The name of the field.
Sequence: The order that the specific field appears on the Soft form.
Code: Unique identifier for the field.
NOTE: In order to use fields in calculations you must have the code field completed.
Mandatory: Prevents the soft form being saved unless this field has been completed.
Format: When formula type is selected, the format field appears - this governs the type of calculation being used and includes the prefix and suffix (as required) in
square brackets either side of the actual format being used i.e. [prefix] {format} [suffix]
NOTE: Make sure to enter a space after the prefix and a space before the suffix within the brackets to space either side of the calculated answer.
Field Types
Check box: A small box on the form into which a check mark is entered as a response to a question.
Date: Inserts a date picker.
Embedded Text: Allows for non editable text to be added to the form (this could be instructions).
Formula: Formulas similar to excel to select specific criteria.
Header: A field for titles.
Memo: Free form text field that allows multiple lines.
Multiple values: Allows for more multiple answers to a question to be selected, this can be in the form of a drop down, radio buttons or check boxes.
Numeric: Allows a number to be selected.
Text: Free form text field in the form of one line.
Time: A time picker.
Format Types
C: Currency will automatically have 2 decimal places and use your system’s default currency (£, $, €).
N: Whole numbers.
P: Percentage, will automatically multiply the value by 100 and add a % sign.
F: Fixed number, specifying the number of decimal places, for example F2 => 2 decimal places.
Formula: This is the field in which you enter your formula using ‘=’ followed by your formula.
NOTE: When referencing other fields within the Soft Form you must use f: followed by the code you assigned to your chosen fields.
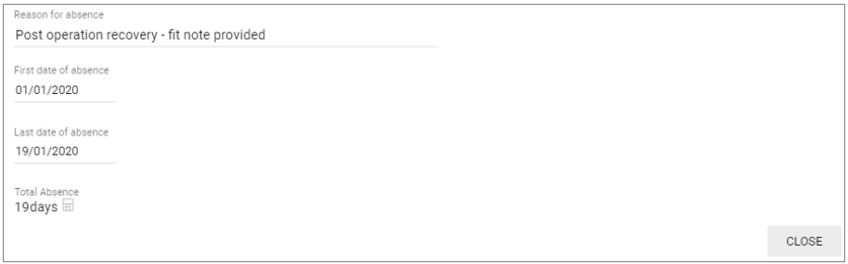
An example for the formula option on a Return to Work Form is to set up a first date of absence and a last date of absence field:
 Then setup a field to calculate the difference between these 2 dates using the format N (for number):
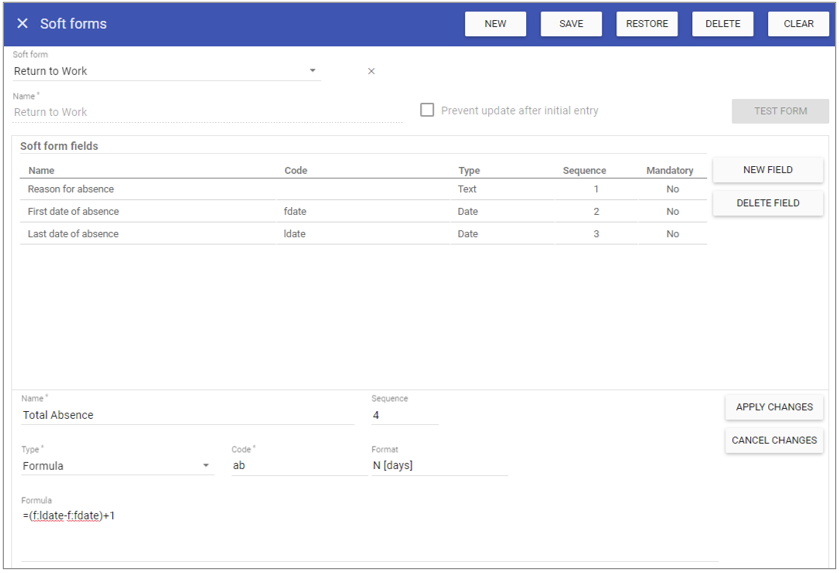 NOTE: The addition of 1 is required in date difference formulas to include both the first and last day of absence.
The outcome of the formula is:
 Apply changes: Save the field to the form.
Cancel changes: Do not save the field to the form.
4. Click on the SAVE button at the top of the main soft forms screen.
Creating a New Soft Form
1. Click on NEW at the top right of the screen.
2. Fill in the details for the soft form including any fields associated with the form.
3. Click SAVE.
NOTE: The soft form should now appear in the list of soft forms when accessing this screen.
Deleting a Soft Form
1. Select the Soft form by double clicking on the required soft form.2. The screen will change to show the details of the selected soft form.
3. Click DELETE at the top of the page.
4. Click DELETE to the delete message.