Items Matrix
Usage
The Items Matrix allows you to setup a set of items each grade of staff requires for compliance.
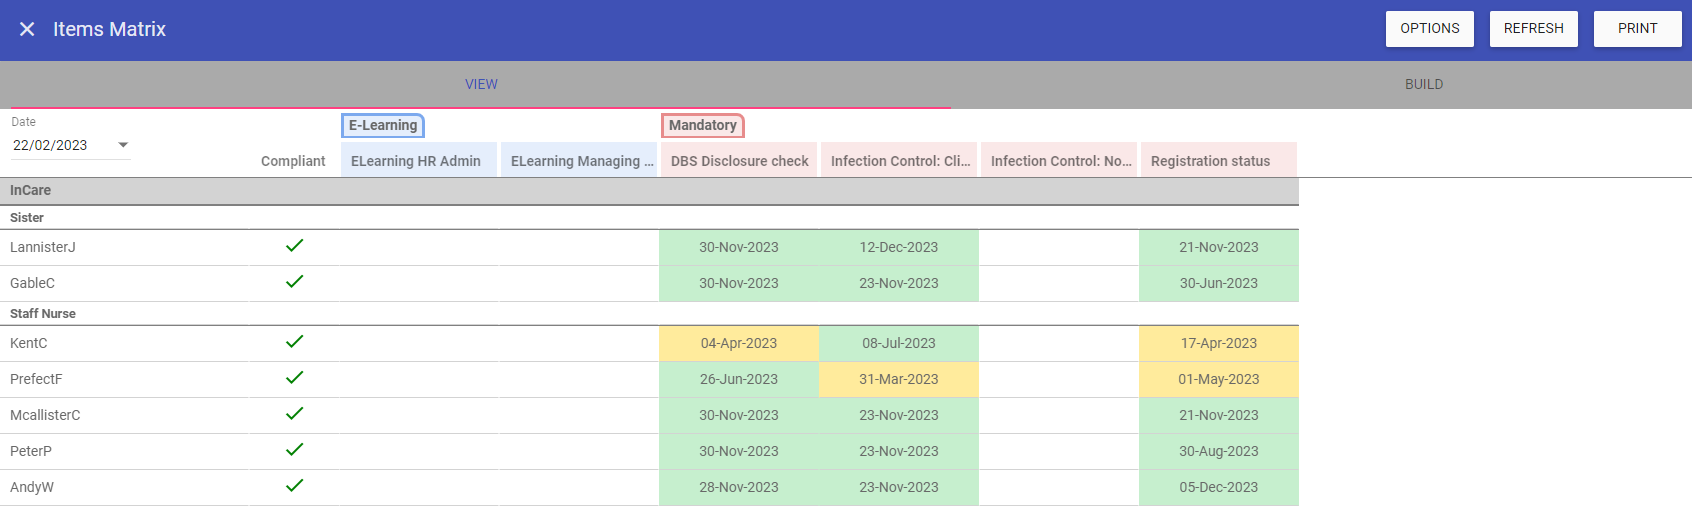 NOTE: A staff member is only compliant if ALL items their grade requires are in date. If one or more have expired then they are not compliant.
Setup
This is done in the BUILD screen alongside the VIEW screen.Grades are listed down the left and items are along the top. It is ordered by folders if you are using folders and by Event/Skill/Training/Staff Extra if folders are turned off.
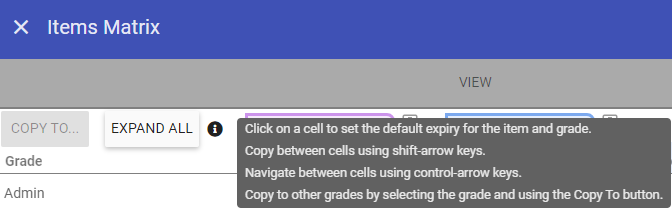
EXPAND ALL: This will open up all the items under each folder across the top of the screen.
Hovering over the (i) icon next to EXPAND ALL gives you instructions on how to use this screen:
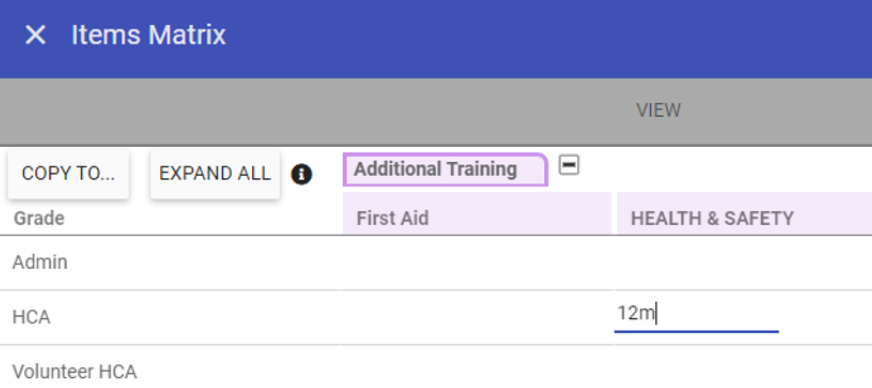
 In order to set an item required for a grade, simply click in the cell corresponding to the item and the grade and enter an expiry period.
You can have different expiry periods for each grade for the same items which are applied both during workflows and when adding to a staff record.
In order to set an item required for a grade, simply click in the cell corresponding to the item and the grade and enter an expiry period.
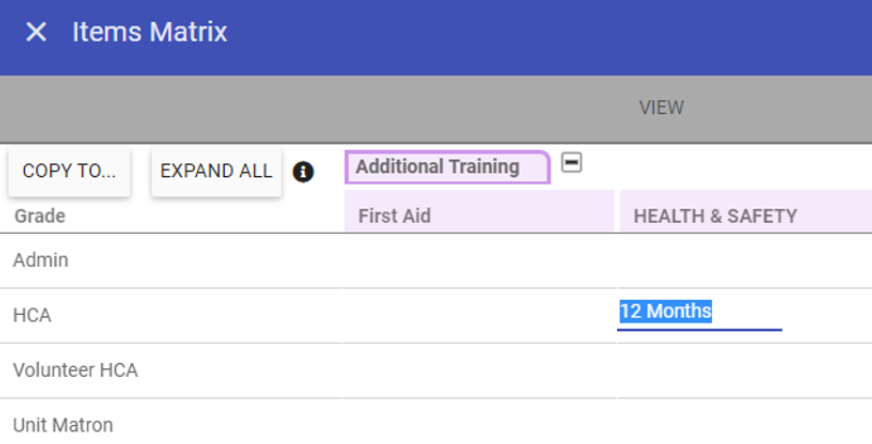
You can have different expiry periods for each grade for the same items which are applied both during workflows and when adding to a staff record.If we choose Health and Safety for the HCA grade and click in the cell, we can then enter numbers followed by a letter to set the expiry period. For example, if we wish to set the expiry period to 12 Months we would enter as below:
 This will change to 12 Months when we exit the cell:
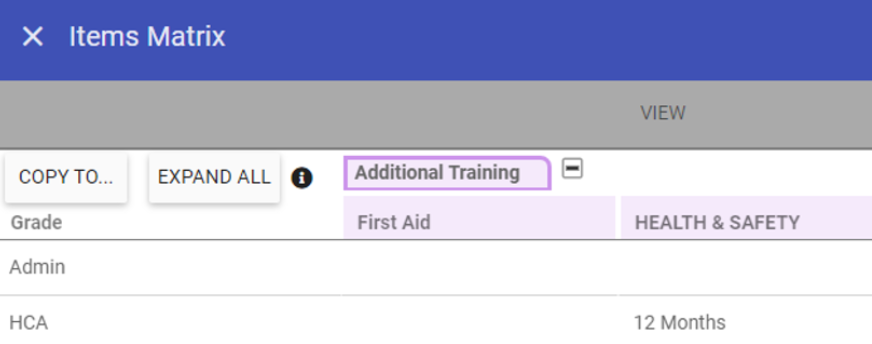 The format is number followed by:
D = Days
W = Weeks
M = Months
Y = Years
NOTE: These are not case sensitive, upper or lower case are both fine.
To make setup easier in this screen you can copy single entries vertically or horizontally by selecting a completed cell then holding shift and pressing the arrow key corresponding to the direction you wish to copy it too:
 12 Months is selected, if you wish to copy this down to Volunteer HCA grade, press Shift + Down Arrow:
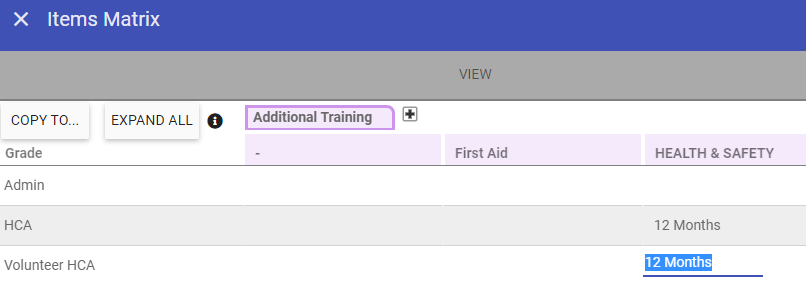 This copies the selected expiry period down to the row below (you can also copy left, right and up by holding shift and pressing the arrow key corresponding to the direction you wish to copy).
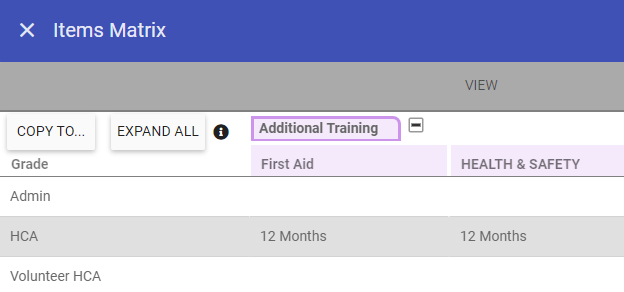
You may have multiple grades which require most of the same items. If you setup a single one of these grades with all the required items you can then copy the whole grades setup to other grades. For example, I have setup HCA as below, if I click on the grade, it will be selected:
 Then click on the COPY TO button and select the
Volunteer HCA grade I wish to copy this to, then click APPLY:
Then click on the COPY TO button and select the
Volunteer HCA grade I wish to copy this to, then click APPLY: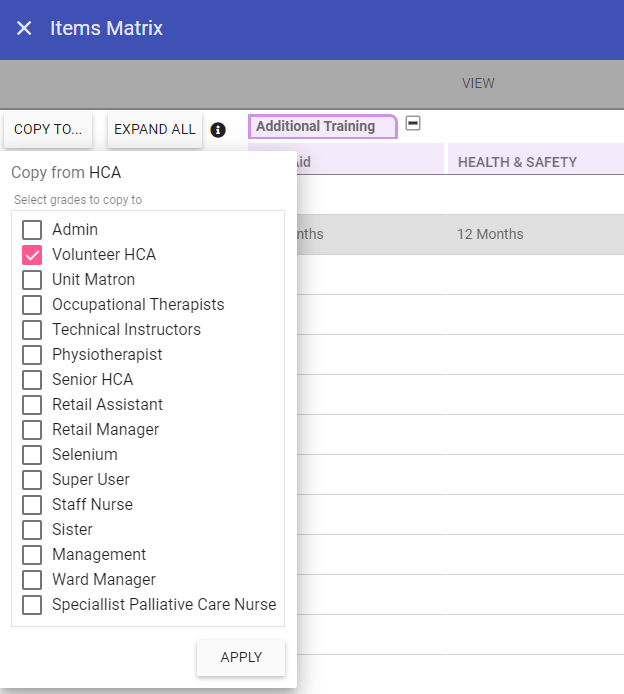 This has copied the setup from HCA to
Volunteer HCA,
now click SAVE to complete the setup:
This has copied the setup from HCA to
Volunteer HCA,
now click SAVE to complete the setup: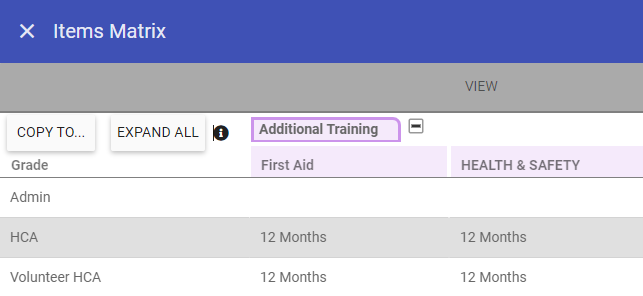
OPTIONS: Clicking on the Options button allows you to select the following:
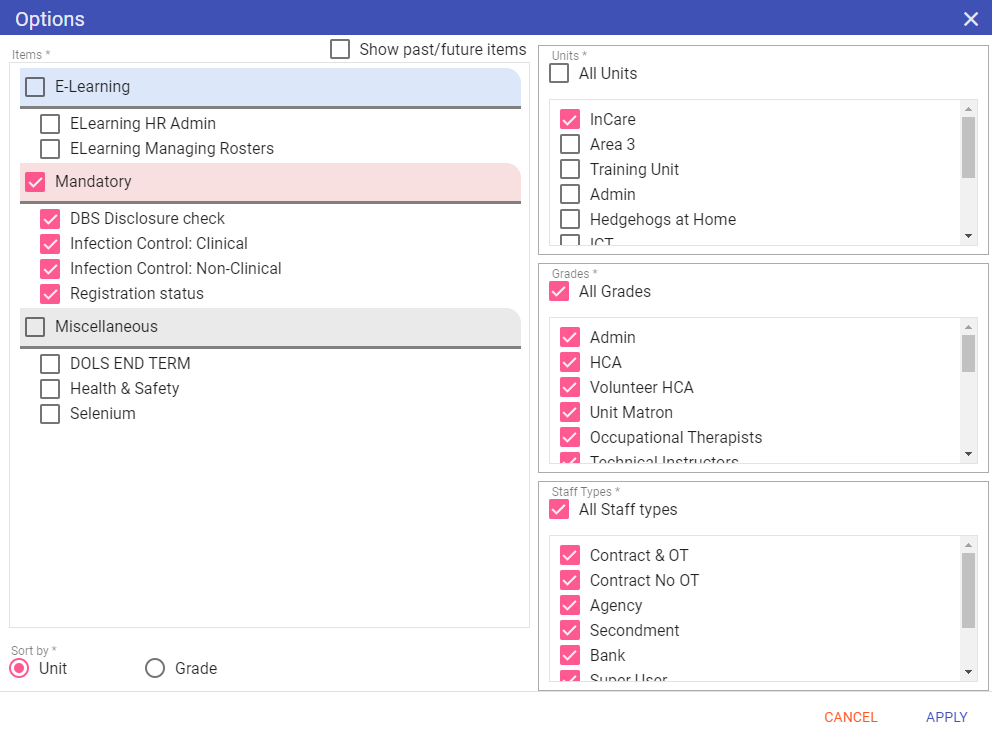 Items: Select the item(s) you wish to check for compliance.
Units: Filter staff by units to which you have access.
Grades: Filter staff by grade(s) you wish to check compliance for.
Staff Types: Filter staff by staff type, so you can check compliance of specific staff groups.
Sort by:
Unit: Sorts by unit first then grade then staff sequence then staff code.
Grade: Sorts by grade then staff sequence then staff code.
REFRESH: Reloads the screen.
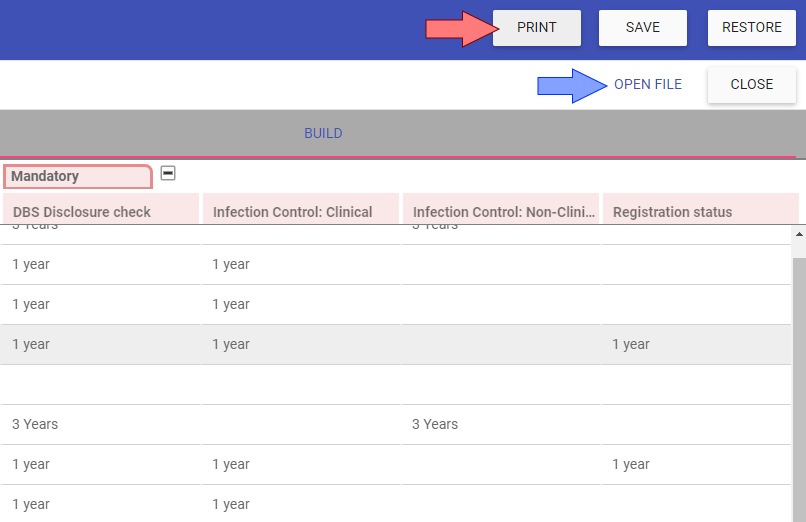
PRINT: Allows you to print what is on both VIEW and BUILD screens.
In the BUILD screen there is a PRINT button, this allows you to output to file the items required per grade for auditing purposes. Click PRINT then OPEN FILE to view the output:
 The output has grades on each row and the folder plus items for each column:
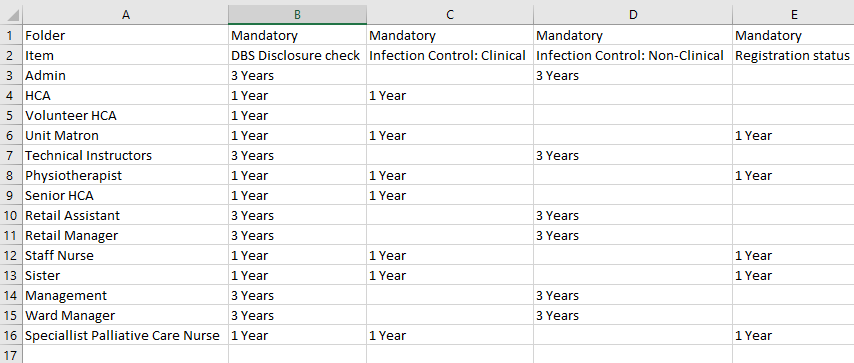 NOTE: Only grades and items which have at least one selection will output when printing.
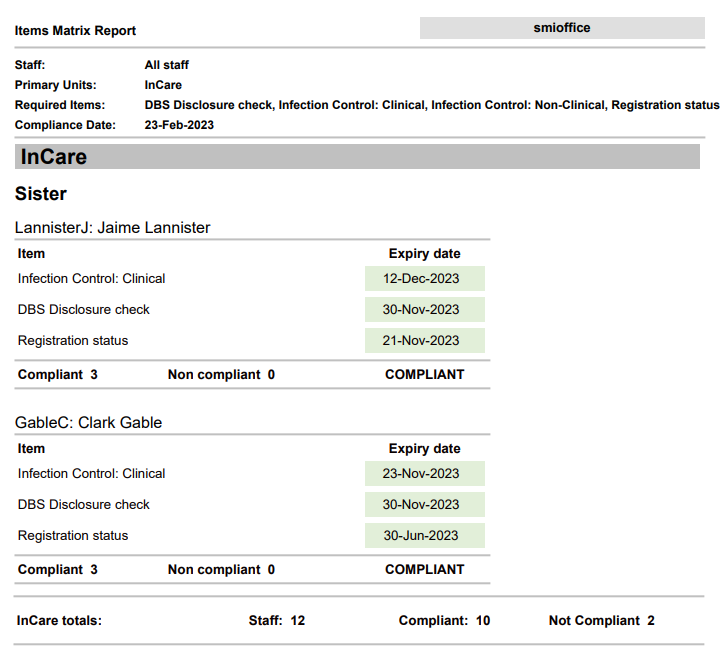
In the VIEW screen you can print to PDF with totals for compliance.
 If you click on the cells within the VIEW screen this will open a half screen Staff Maintenance and allow you to view the required item for the person you selected.
Click On Hodor's Health & Safety:
If you click on the cells within the VIEW screen this will open a half screen Staff Maintenance and allow you to view the required item for the person you selected.
Click On Hodor's Health & Safety: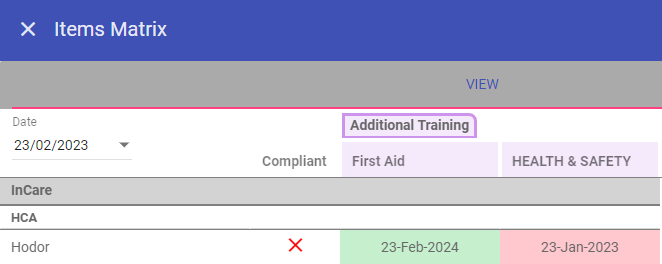 Hodor's Staff Maintenance record opens on the
selected item, this can be updated or a new one added. Update the start and end dates to match the soft form
(if required) and click SAVE:
Hodor's Staff Maintenance record opens on the
selected item, this can be updated or a new one added. Update the start and end dates to match the soft form
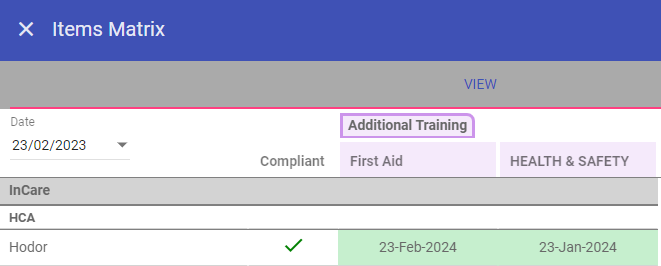
(if required) and click SAVE: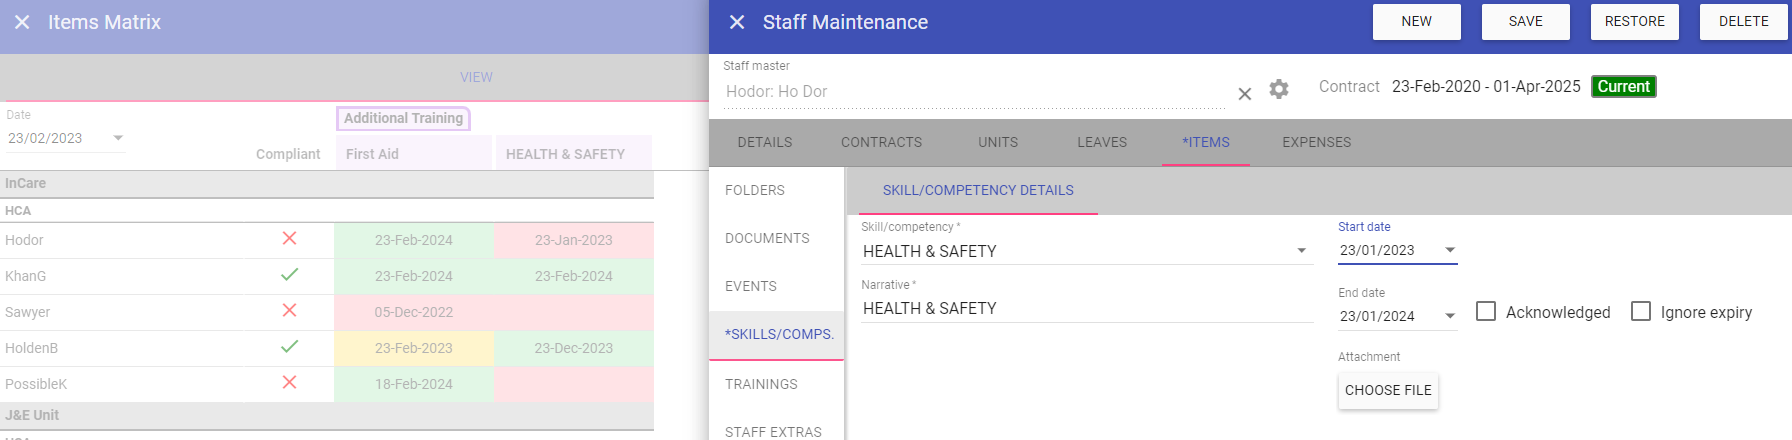 To return to the full screen Items Matrix, just click the X icon to close Staff Maintenance.
This returns you back to the Items Matrix and we can see Hodor is now compliant:
 NOTE: You can only update items to which your security group has full access.