Unit Maintenance
Usage
This screen allows you to configure Units created in Admin > Units. The configuration here filters through to the rotas.
Details
 Start date: Enter a date when the unit master will start. This will need to be the same as the date of the first schedule required. Ensure that the date chosen reflects the normal starting day for a rota, if the unit schedules from a Monday ensure the date entered is a Monday.
End date: Enter a date when the settings for the master will end. Usually this is not known so a date in the mid-future can be entered. Details can be modified, including the end date, at a later time if required.
Budget/Value: The weekly budget assigned for the unit. Used to match against staffing wages/paycodes in the budget report.
Normal dependency: Multiple unit masters can be created for the same unit, each containing slightly different Needs requirements. This number is to distinguish between the different Unit Masters. A default value can be used to meet client needs. For example, Normal Dependency=2, High Dependency=1, Low Dependency=3.
Head room percentage: Outputs the Headroom percentage for the Unit Master.
Hours per patient: Number of hours allotted to a patient.
Default number of patients: Number of
patients per unit.
Last closure date: Displays the last date a schedule was closed for this unit
Opening days: The days the unit is open.
Bank request fill email addresses: If automatic Bank Staff Requests are being used, enter the email addresses to which the requests will be sent.
Analyse report template:
Links to a template which is created after the unit is built to allow Leave analysis across a specific unit.
Rota
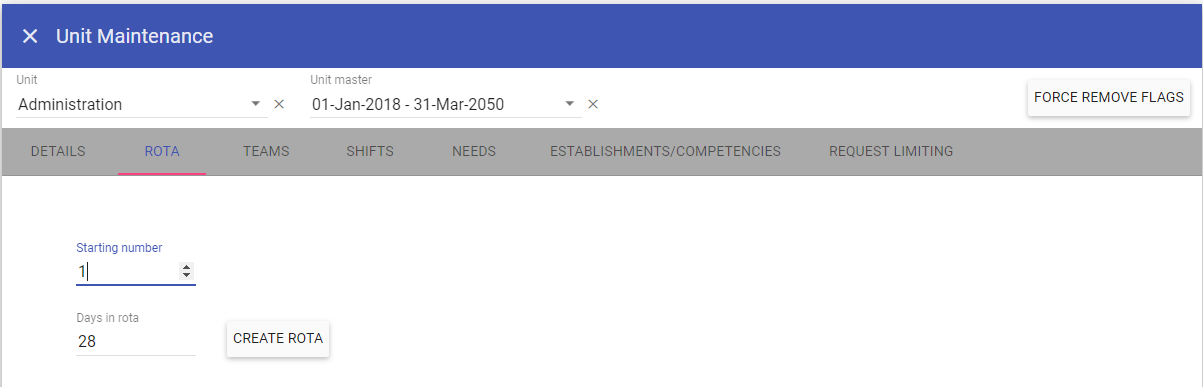
Starting number: This defines the number of the first schedule, for example, when starting at the beginning of your sixth rota period enter the number 6. If all of your units/rotas have the same number of weeks i.e. 2/4 or 6 weekly rotas, then you may wish for all units to have the same
rota number. Remember that when assigning future rotas, check which number your existing rotas have reached at that date and assign the rota number accordingly.
Days in rota: Enter the number of Days In Rota (in multiples of seven days).
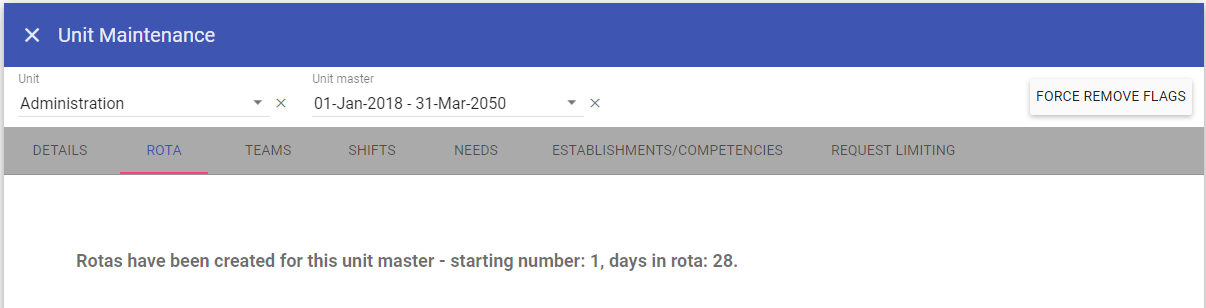
Once a rota for the unit has been created successfully this cannot be changed and will show the following.
Teams
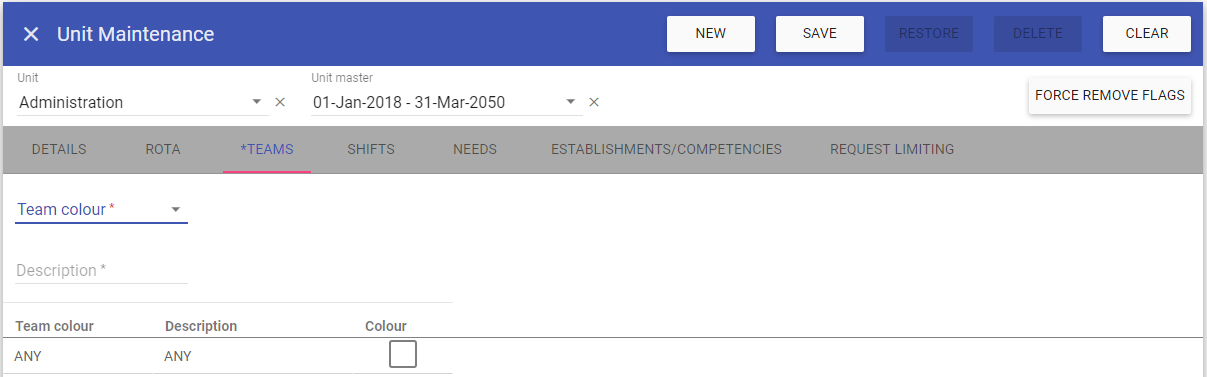
Team Colour: The team colour displayed on rotas.
Description: The name of the team.
Shifts
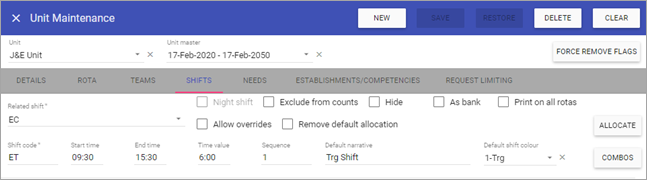
Related shift: Choose whether this is a main shift, or a shift related to main shift.
Night shift: Staff members set as ‘Days only’ cannot be scheduled on this shift.
Exclude from counts: This will exclude the shift from the rota count when assigned to a staff member (e.g. Admin staff and Managers).
Hide: Check the Hide tick box if you wish to remove the shift of dropdown selections (for redundant codes).
As bank: Allows you to create shifts that will be defaulted to and always be entered as bank shifts on the rota.
Print on all rotas: When selected, this shift will print across all rotas for any staff on any unit as long as the staff member is
selected in the filters (show Secondary/Bank).
NOTE: If you select the main shift and tick Print on all rotas then this will apply to all sub shifts, just like Night shift.
Allow overrides: This will allow a shift to be worked in a room that it is not designated to be worked in.
Remove default allocation: Selecting this will remove staff from their default rooms when the shift is added (working from home for example).
Shift code: Code for the shift e.g. E = Early (Max 2 characters).
Start time: The actual time that the shift starts.
End time: The actual time that the shift ends.
Time value: Hours and minutes are used here. This determines the amount of time that will be deducted from the staff member hours when the shift is assigned to them.
For example, a shift from 08:00 to 20:00 (12 hours) with 1 hour for lunch would have a time value set for 11 hours.
Sequence: Enter a number between 1 and 99. This determines the order in which the shift codes are listed.
Default Narrative: Additional information regarding the shift (displays on rota hover, shifts menu, bulk shift list and in My Staff.Care).
NOTE: When the sub shifts are using the main shift code narrative these show in orange text.
Default shift colour: Select the relevant colour for the shift created (in Admin > Shift Colours).
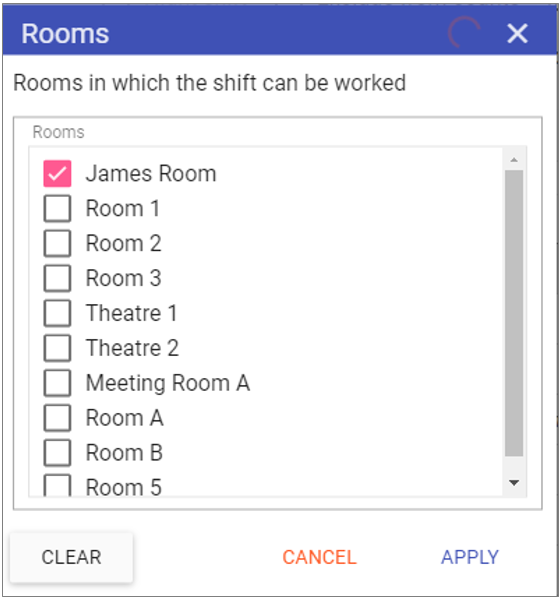
Shifts - Allocate
Clicking the Allocate button brings up a list of all selectable rooms:
Shifts - Combos
Clicking on the Combos button will allow you to set up combos to include 2 shifts (Early and Late) which can be amalgamated to create one long shift i.e. W shift:
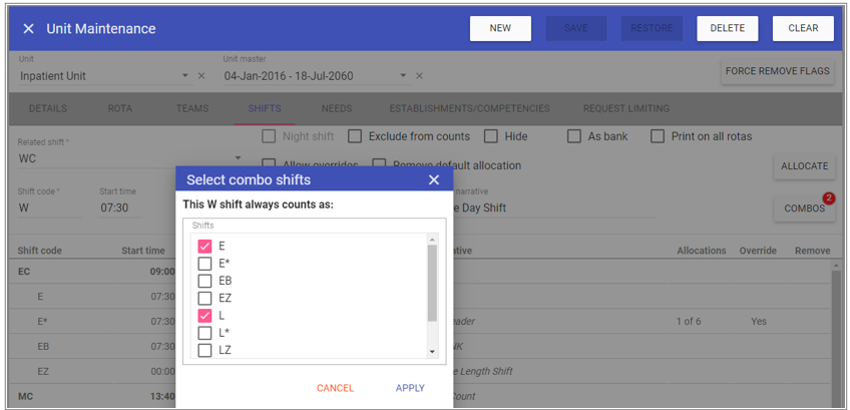
This means every time a W shift is added to the rota it will ALWAYS count as an E and an L.
Rota Screens
If you print within the rota, the secondary unit shifts on the Training unit now output:
 As you can see, there is a separate row for the Training unit on the report for Han Solo with his FS shifts.
If we set to print using times, the Training shifts times are also displayed:
 REMEMBER: This functionality is designed for training shifts only, SMI do not recommend adding more shifts to print across rotas as the reports will become unmanageable.
Needs
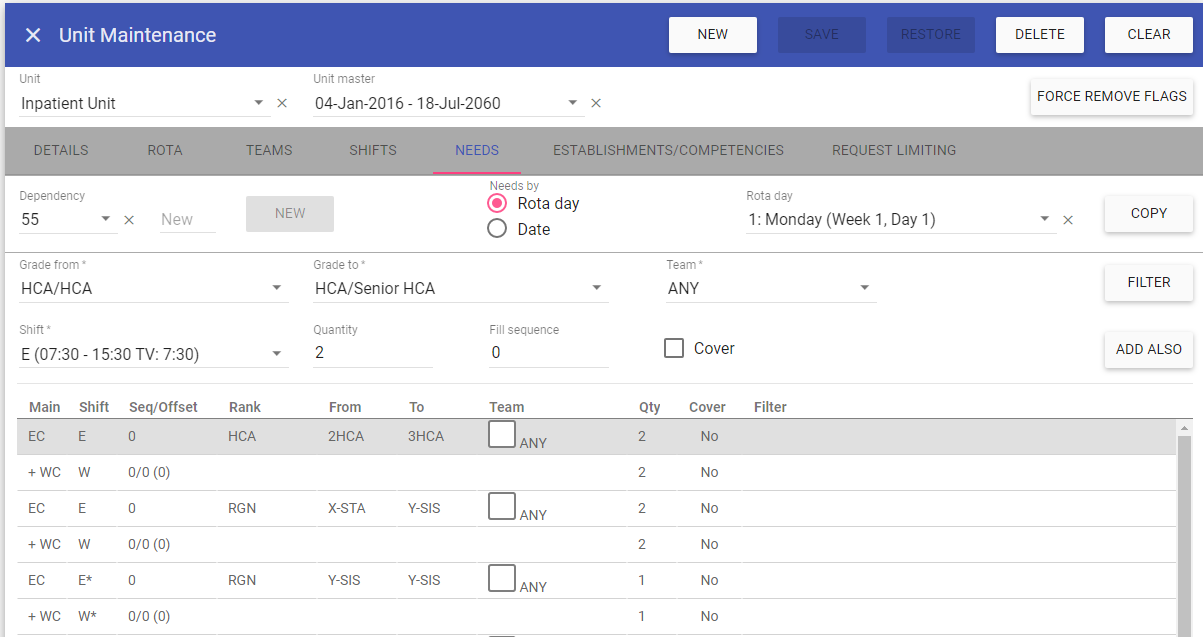
Dependency: Most organisations only have one dependency. However you might require a higher dependency, with increased needs, for specific days of the year. If no Dependencies have been created, enter a Dependency value in the adjacent empty box and click the New button.
New: Allows you to create a new Dependency.
Needs by
Rota day: Lists each individual day of the rota by week and day. Select the required week and day from the list against which the needs will be set. Whether you have a 7, 14 or 28 day rota, each day will need to be completed individually. If all the needs are the same, you can simply copy from one day to the other.
Date: Set needs by specific date.
E.g. Christmas Day.
Grade to: Select the required grade i.e. Grade XR05.
Grade from: Select the grade required. Either the same grade as Grade From can be selected, meaning only that grade can
fulfill the need requirement, or a range of grades can be specified, meaning that any grade within the range can
fulfill the need requirement i.e. XR06.
Team: Select the team to which the staff member must belong to.
Shift: Select the shift you require covered.
Quantity: Enter the number of staff required at the specified grade/s etc.
Priority: Select the
priority of the need, 0 being the highest. This also is the ordering of the need order sequence.
Cover: When checked, flags that the need must be met, for example, if the ward cannot open without this rank/grade in attendance.
Filter: This allows you to filter your requirements further
dependent on the skills, trainings, events, extras and also gender and age.
Add also: Allows you to select additional shifts that can also meet the need of the originally specified shift, for example if no staff are available to work an ‘E’ shift, then you will accept someone to work an ‘E1’ instead.
Copy: Allows for previously created needs, for other rota days, to be copied and used against another rota day.
Establishments/Competencies
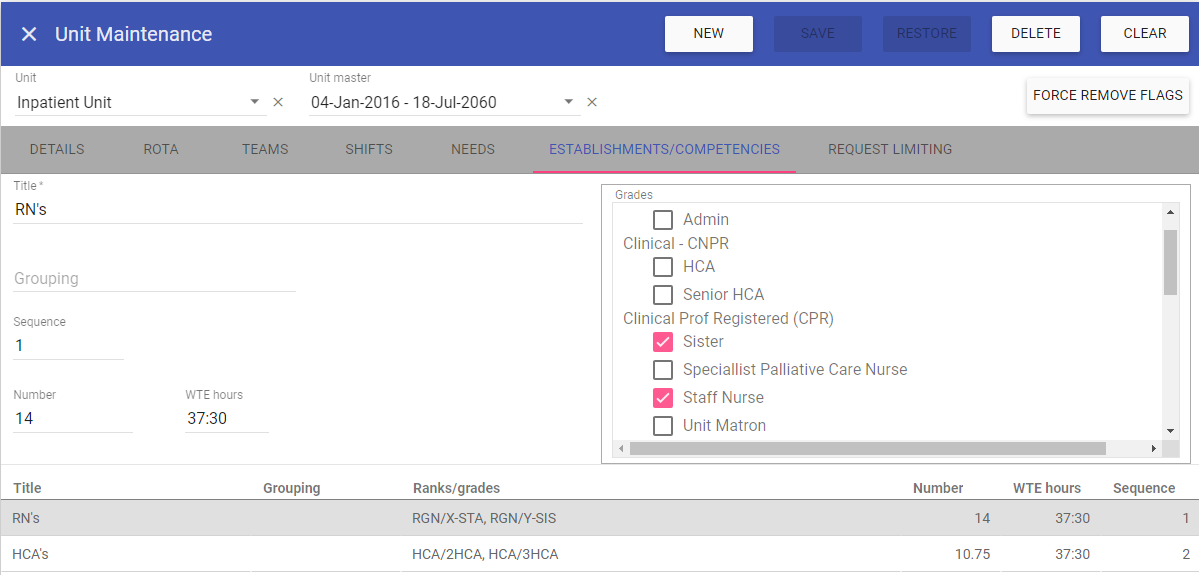
Title: Enter a descriptive title for the selected Ranks and Grades (50 character maximum)
Grouping: To link with external grouping codes.
Sequence: Enter a number to determine the order (sequence) the selection will appear in the list and on the report (0=Top, 99=Bottom).
Number: Enter the number of whole time staff make up the Establishment numbers.
WTE hours: Enter the Hours and Minutes time value for a whole time equivalent.
Grades: By checking the tick box, select the Ranks and Grades that make up the selected Establishment requirement.
Request Limiting
Under this menu there are 2 sub-menus, LIMITS and STAFF GROUPS.In the LIMITS sub-menu you can choose which leaves are to be limited and the percentage thresholds for displaying different colours as leave requests are made:
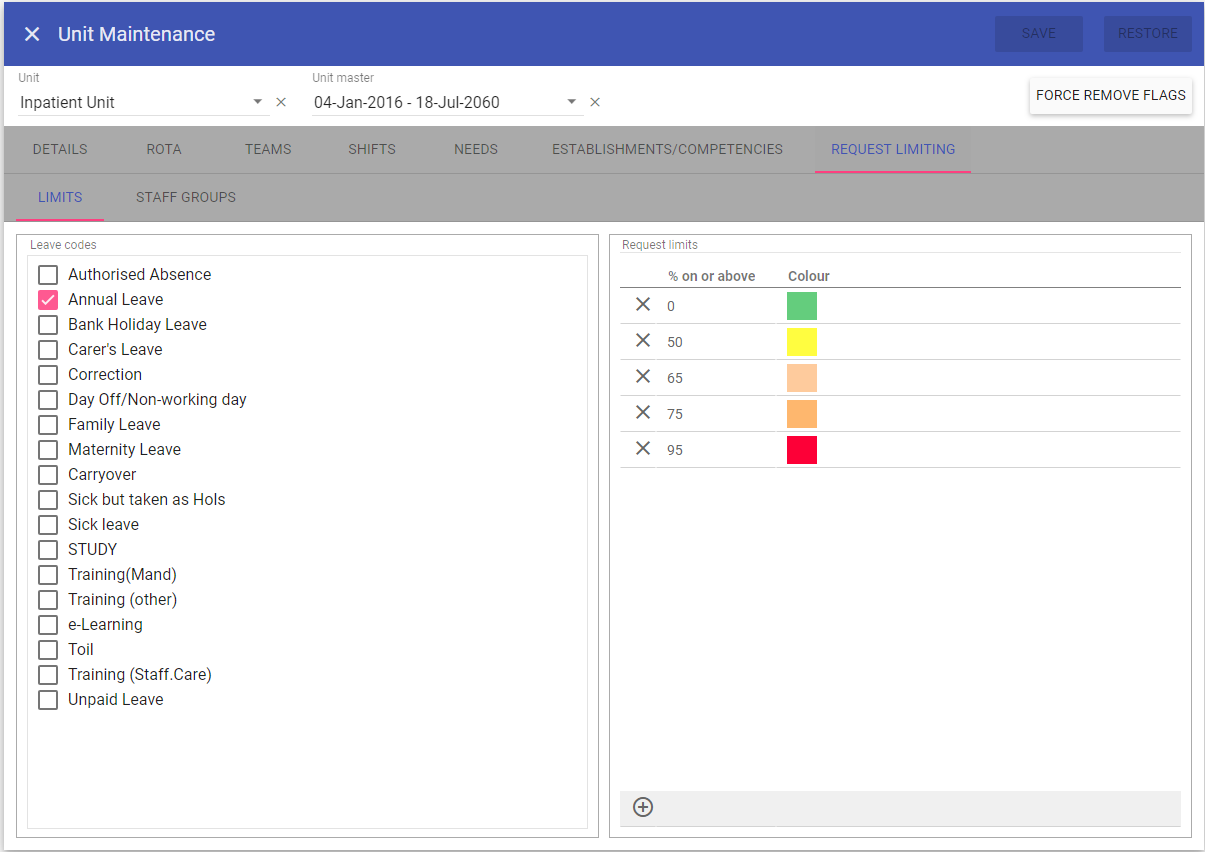
Leave codes: Here you select your Annual leave and Bank/Public holidays or if you combine them Annual and Bank Holidays combined. These will be the leave codes which can be limited.
NOTE: You must only include requestable leaves that can have a time value associated AND NOT day off requests (these are whole days off with 0:00 hour time values so would have no effect).
Limit Colours: Here you can set the percentage from and the colour you wish this to display.
You can have as few or as many limit colours as you like, press the X icon to remove a limit and its associated colour and press the little (+) icon to add a new one:
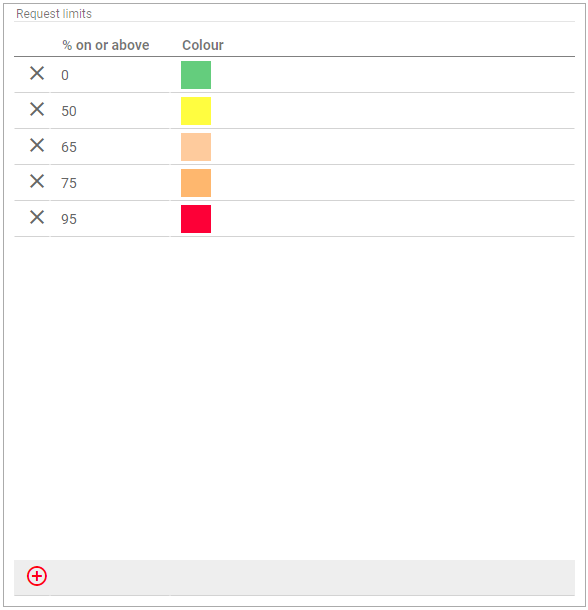
This will add a new row in the Limit colours section and allow you to set a new percentage and colour:

Clicking SAVE will save any changes and RESTORE will revert to the last saved settings in this screen.
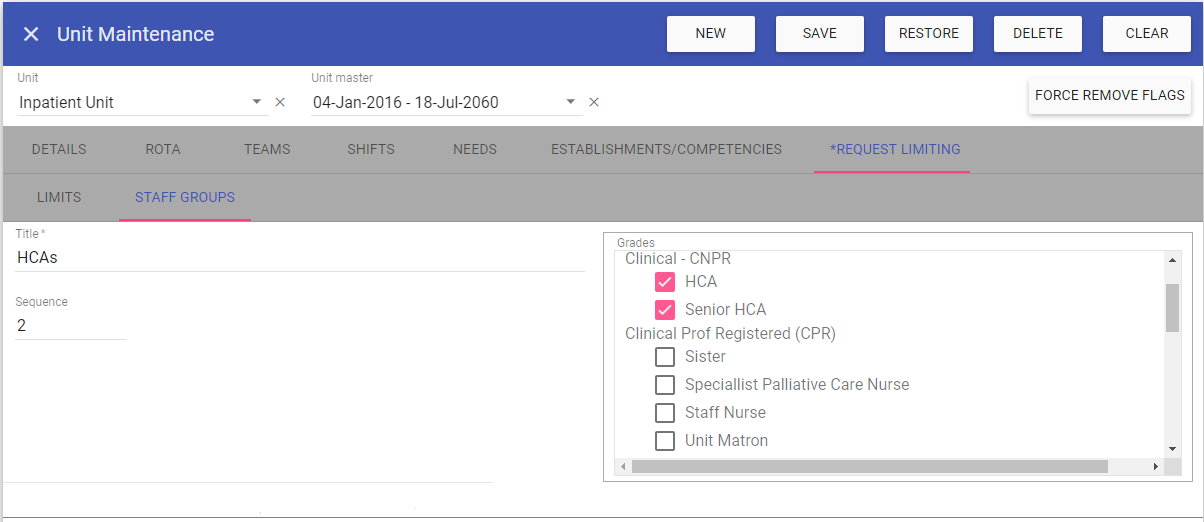
The STAFF GROUPS sub-menu allows you to name and setup multiple groups of staff, by grade, on which you can apply limits:
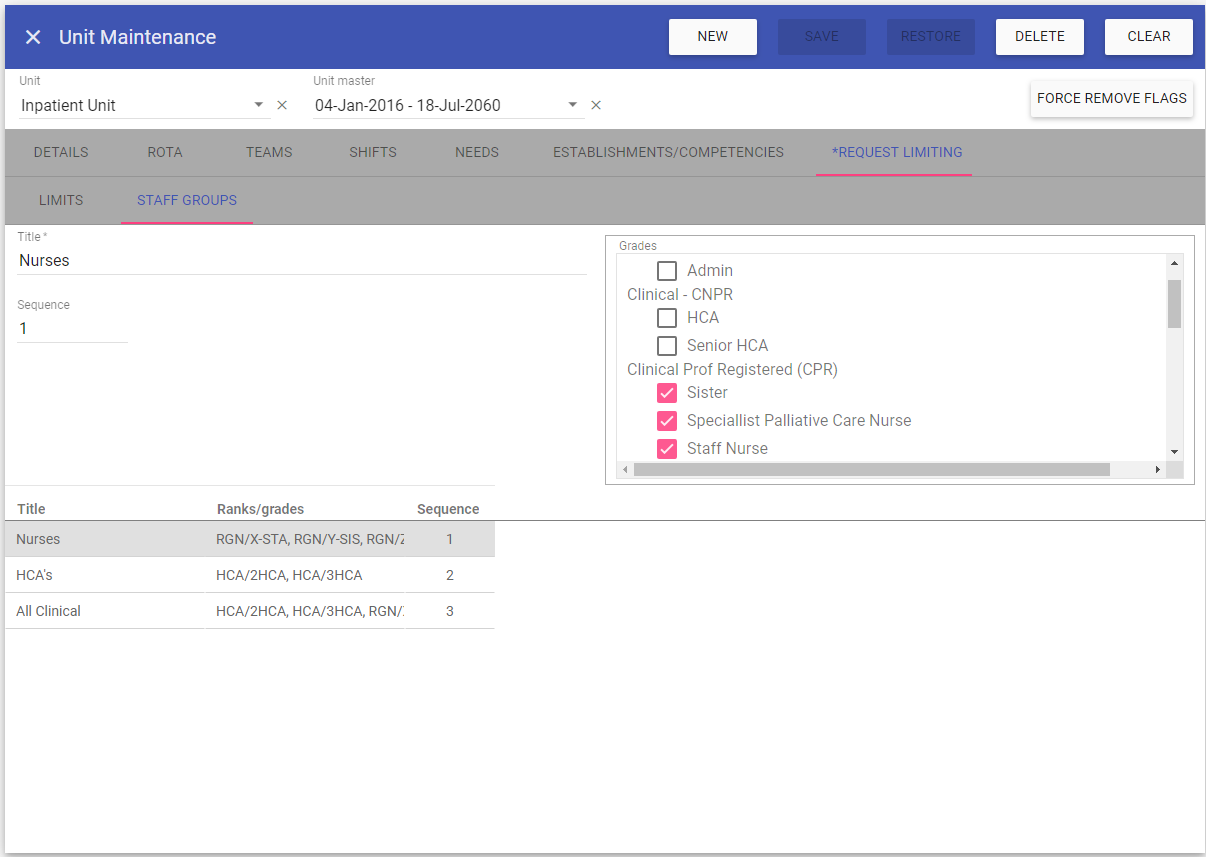 Title: Name that will be displayed in View Requests for the request limit group row.
Sequence: Order which the request limit group will appear under the unit in View Requests.
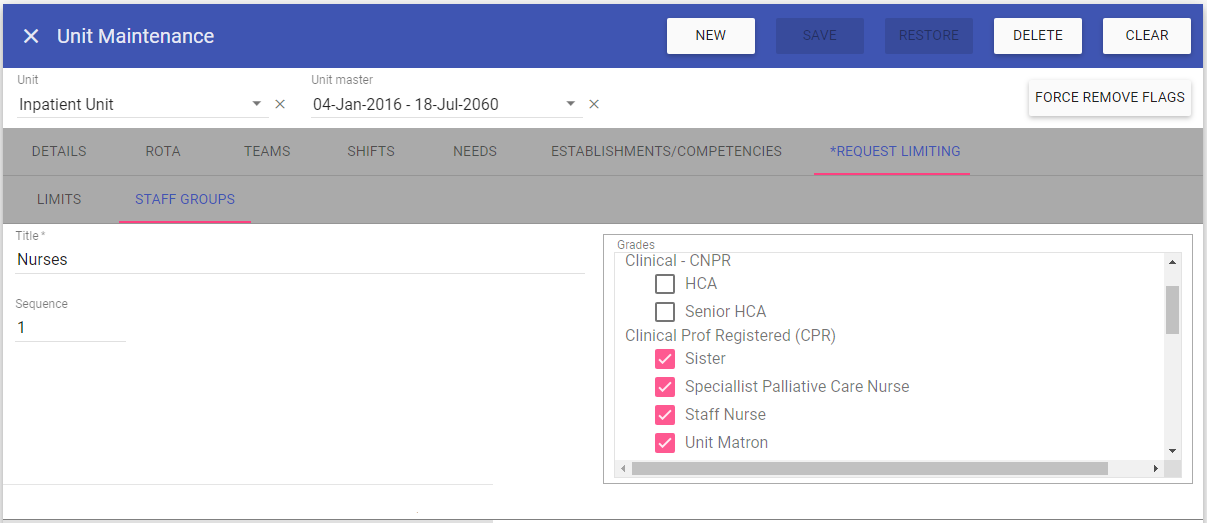
Grades: Grades to which the Request limit will be applied.
NOTE: Grades are not mutually exclusive per unit so you can have multiple grades appear in more than 1 request limit group.
In the example below we have setup a group limit for nurses (including all nursing grades), a group limit for HCAs (including all HCA grades) and another limit for All Clinical Staff
(which includes all grades for both Nurses and HCAs).
NURSES:
 HCAs:
HCAs:
 All Clinical:
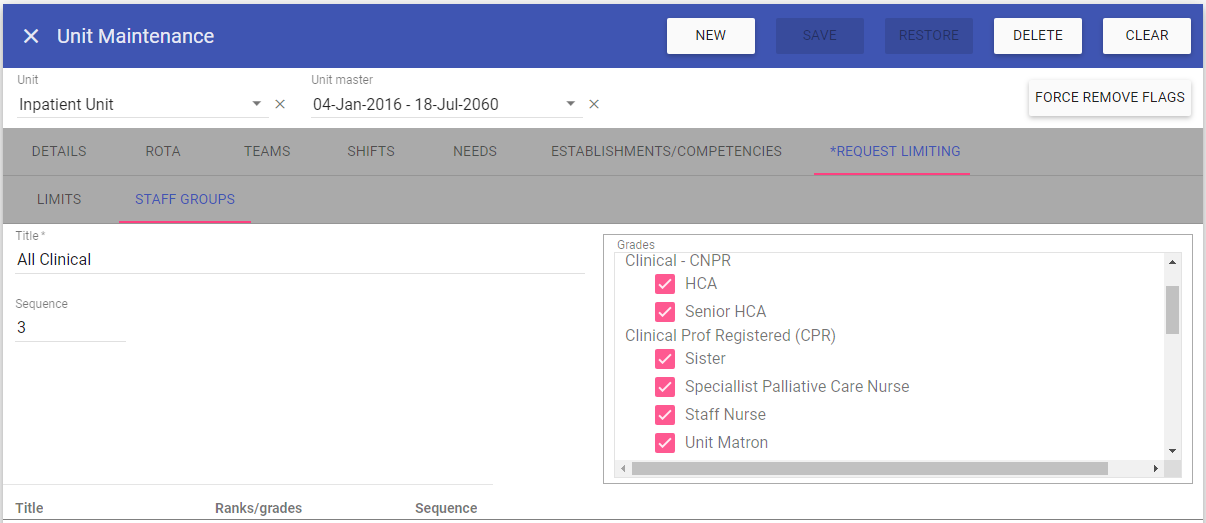 The All Clinical group allows you to impose a higher limit on a combination of the 2 other groups on this unit, much like leave groups in unit maintenance.
This means you can allow the same number of leave hours for both nurses and HCAs then limit the total clinical time off to a lower amount than the 2 separate groups combined.
The All Clinical group allows you to impose a higher limit on a combination of the 2 other groups on this unit, much like leave groups in unit maintenance.
This means you can allow the same number of leave hours for both nurses and HCAs then limit the total clinical time off to a lower amount than the 2 separate groups combined.